Conduct a Poll/Questionnaire In Depth Version
Polls & Questionnaires
To make and manage poll questions, click ‘Polls’ under ‘Features’ in your advertiser dashboard.

Here, you will see the poll id number, the question, the coupon id if there is a coupon attached, and buttons to send and edit on either side of this information. To make a poll, click ‘Create New’.
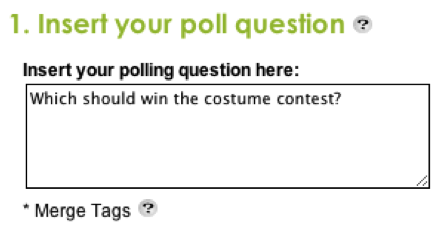
You are first asked to provide a question you want to ask to your recipients. You can use merge tags, which allow you to personalize the message. Click the ‘?’ icon for a guide on how to use the merge tags.
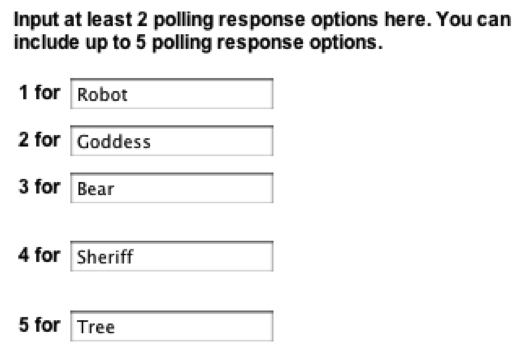
Next, type in the responses. You can add anywhere from 2-5 responses.

Add in a coupon or a message that will automatically be sent to the customer when they send a valid response to the poll. Click ‘Save’ and you will be directed back to the table with all the polls you’ve made. You can send them as many times as you want to as many opt-in lists you want. You can send the poll now or at a scheduled time of your choosing. When editing or sending the coupon, a preview will always be available on the right-hand side for you to see what the mobile user sees when they get the question.
To create and manage Questionnaires, go to ‘Questionnaire’ under ‘Features’ in your advertiser dashboard.
The questionnaire landing page is in the same format as the poll page. Click ‘Create New’ to make a questionnaire.

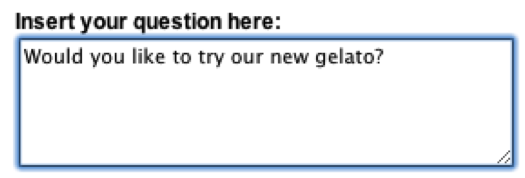
First, ask your question. You can also add merge tags to personalize the message.
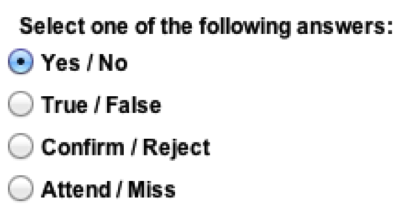
Select what kind of answer you would like to the question: yes/no, true/false, confirm/reject, or attend/miss.
Lastly, include a coupon, a message, or nothing if the user responds to your question. Click ‘Save’ to save your question. As always, a preview of the question will be to the right-hand side of the edit and send pages. To send the question to users, click send on the main page after creation, specify one or multiple opt-in lists, add a number, and choose whether send the message now or send it scheduled. Click the ‘Send’ button when you are ready to send out the message.