Upload Contacts: Quick Version
Upload Number
Upload mobile numbers to your lists manually, or by uploading a csv file. Every contact you upload uses ONE CREDIT!
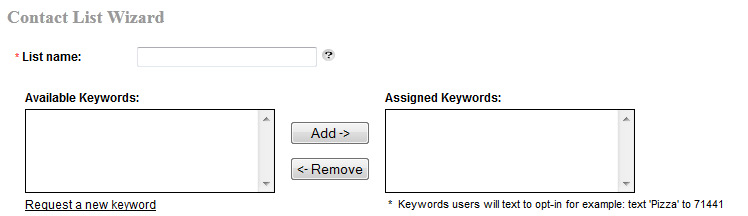
List name: Create a list name for your opt-in list. Your customers will not see this.
Available keywords- When you create a keyword, it will appear here. If you do not have one click on "Request a new keyword" Once you have a keyword, click "Add->" to have the keyword appear in the "Assigned keywords" box.
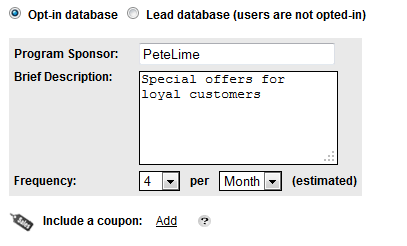
Choose if you want your customers to opt in by clicking on "opt-in database". Click "Lead database" if you do not want your users to opt in.
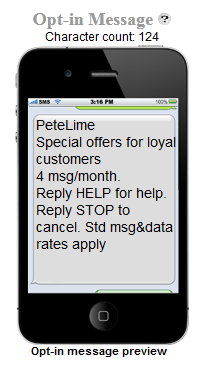
Input your information. Insert a name where it says "Program sponsor".
Brief Description- Input the information you want your customers on your list to receive
Frequency- Here you can change how many times a month, week or day you want to send your contact list information
Include a coupon- Click on "Add" to attach a coupon to the text message
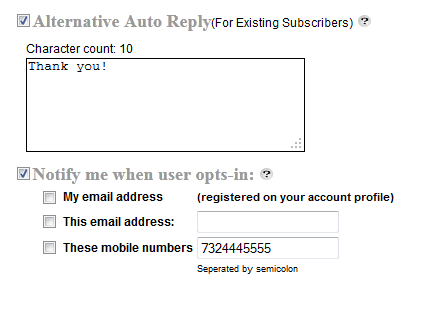
Alternative Auto Reply- Use this feature if you want your existing subscribers to receive a different auto-reply message from your main one in case they text the keyword again
Notify me when user opts-in- You can receive a notification every time a new opt-in comes through. Enter your email or phone number to receive these notifications